Our 90’s RV Renovation
90s Motorhome Renovation
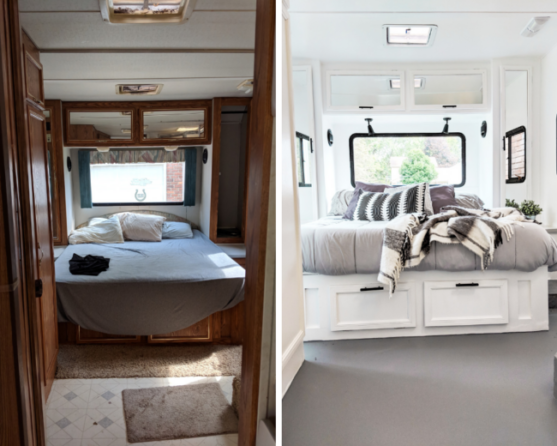
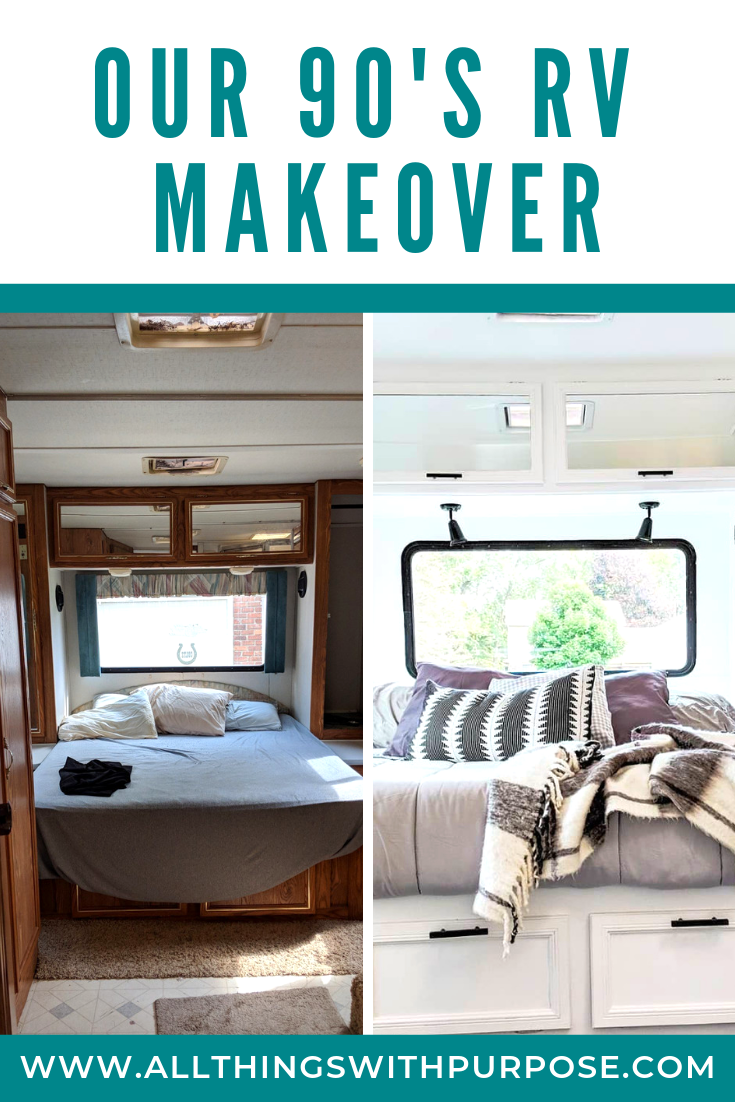
Today is the day. I’m sharing all the amazing “before” and “after” pictures from our latest RV renovation! We started with a 16 foot vintage camper and have slowly upgraded as our family has grown. My husband looked at me one day and said “I think I’d like to try a motorhome instead of a trailer.” I knew in that moment that our next adventure was about to begin! The adventure of RV ownership brings a lot of challenges and lessons to learn. Driving and maintaining a motorhome is different from pulling a trailer in so many ways.
If you missed any of my Insta Stories highlighting the whole renovation process, you can watch them here: 90’s RV Renovation on Instagram
What We Got
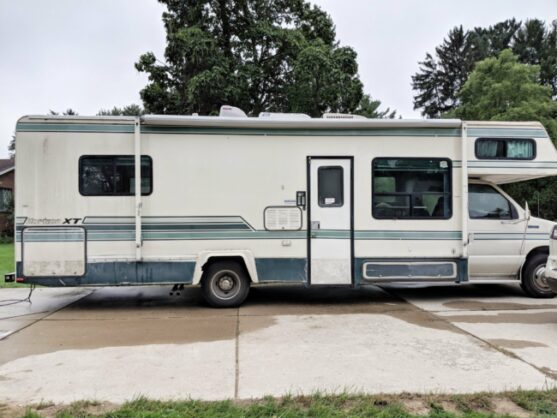
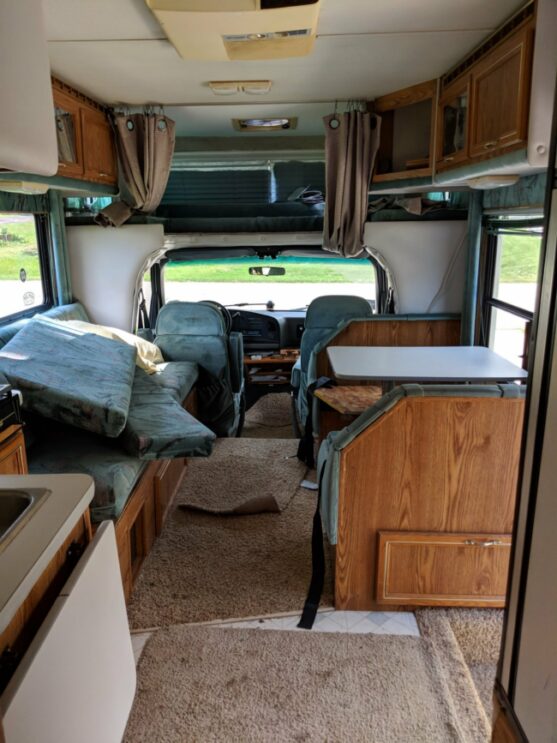
We found this 1994 Horizon – 29 foot “class C” Motorhome RV on Facebook Marketplace. It had 82,000 miles on it when we bought it. I used to have great success finding campers on Craigslist, but in recent years, Facebook Marketplace has taken over. I love hearing the stories behind campers. It’s always interesting to hear what it was previously used for. This one was repaired by an older man and then sold to a women with teenage sons who traveled around to music festivals. The teenagers would store their kayaks in the camper – hence, a lot of water damage and banged up floor trim. The man who owned it before them would travel the country, most frequently to Florida for NASCAR races (the proof was in the bumper stickers!).
The Damage
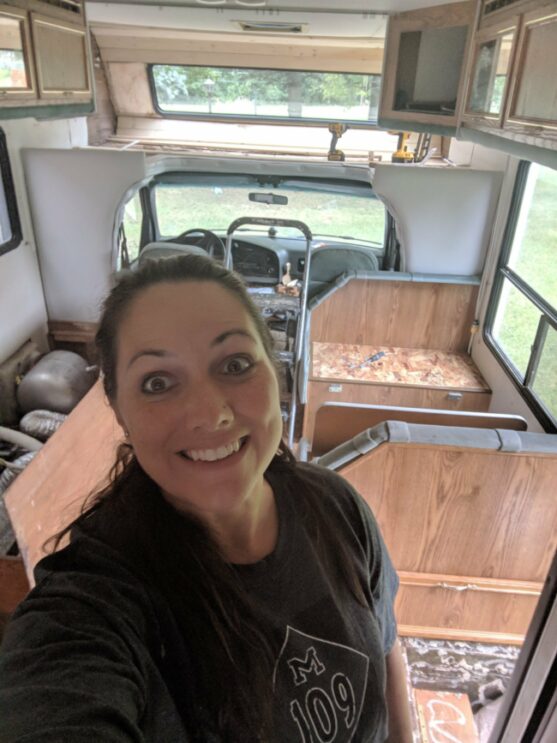
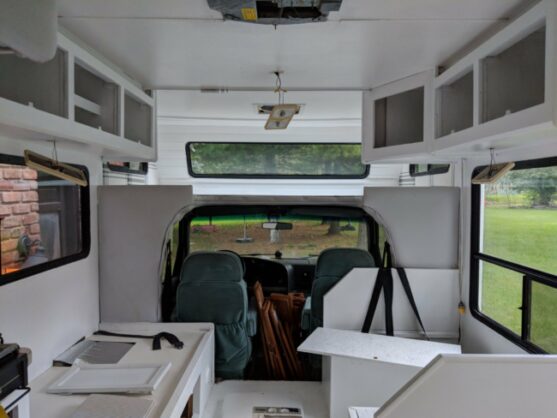
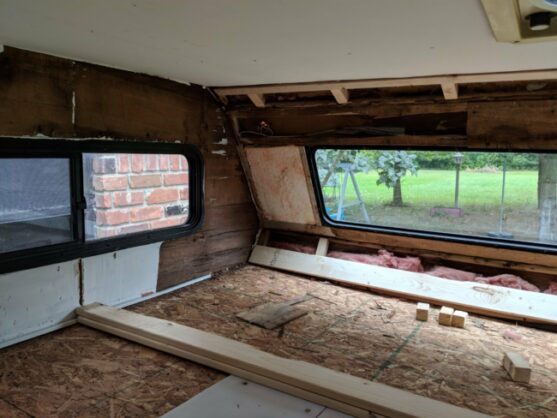
We negotiated and purchased this RV for $3,500. We figured we would need to put around $2,000 into it to get it where we wanted it to be. After a thorough inspection, here are the areas of concern:
- Water damage in the front cab-over bed and in the rear ceiling
- Everything smelled
- Gross carpet
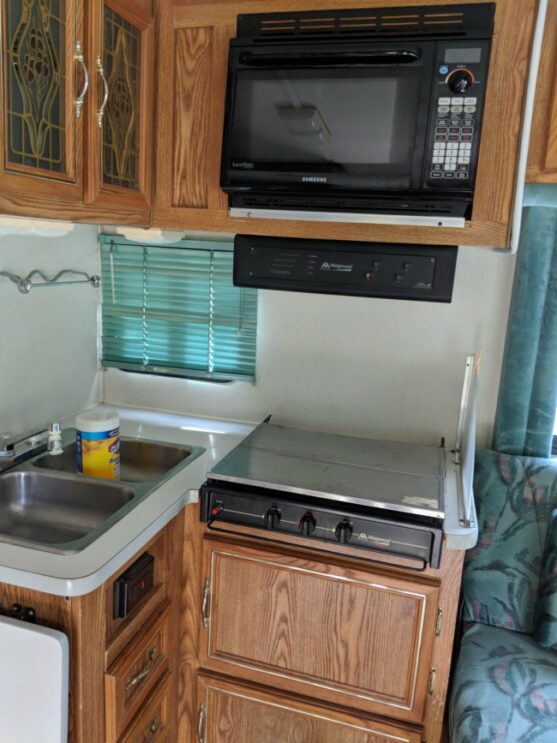
- Outdated everything
- Broken toilet seat
- Air ducts were chewed through by mice
- Old style lights and yellowed fixtures
- Wheel coverings were cracked
- Roof damage
- Broken window coverings
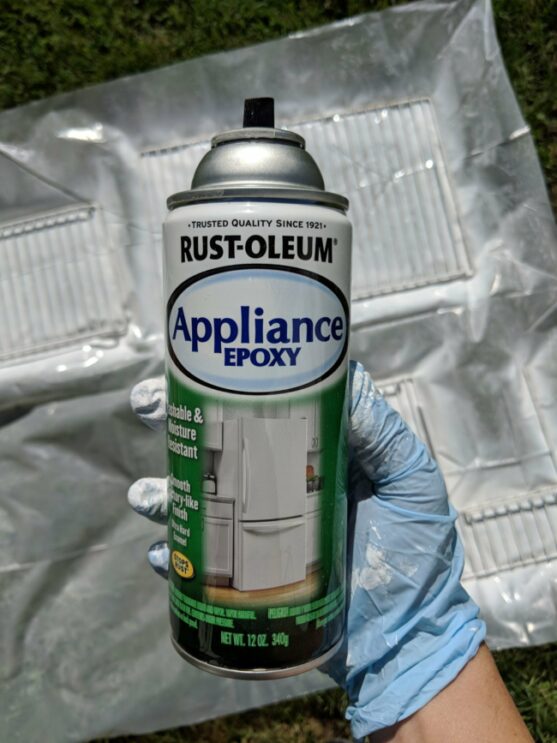
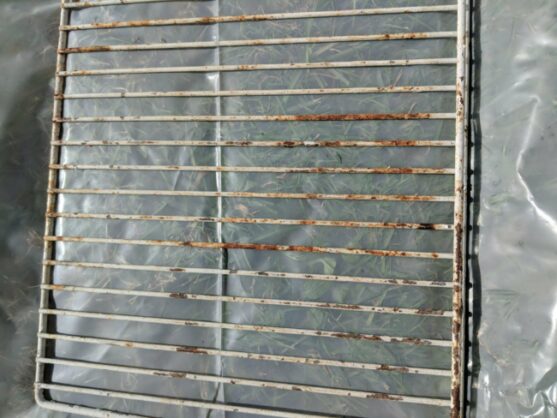
- Fridge doors were banged up
- Microwave broken
- Weird smell while driving – coming from muffler. Upon further inspections: muffler was overheating and burning a hole through the floor boards!
The Plan
We always start by assessing the damage and then make a to-do list of the things we want to tackle.
- Repair roof damage, seal all cracks and ensure everything is water tight before starting interior repairs
- Paint exterior so it looks better sitting in our driveway!
- Remove all bumper stickers and window decals
- Remove window coverings and valances
- Remove all cushions, couch and mattresses
- Remove all carpet and curtains
- Bleach everything!
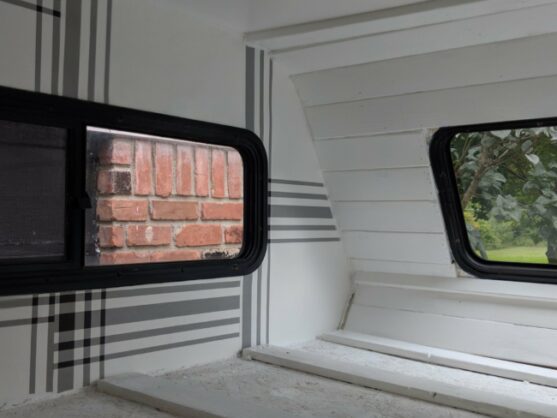
- Paint walls and ceiling
- Paint cabinets
- New cabinet hardware
- Paint ceiling vent covers
- Paint air conditioner unit
- Replace all lights with new 12 volt LED fixtures
- New couch
- Roller shades for windows
- Replace mattress
- New toilet
- Paint floor or lay new flooring
- New smoke detectors, carbon monoxide detector and LP gas detector
- New microwave
- Fill propane tank
- Seal up holes where mice can get in
- Decorate!
- Check engine, get tune-up
- Repair muffler damage
My Favorite Products
Here are a few of my favorite products that we used on this project. I’ll be posting more soon, on specific things we did.
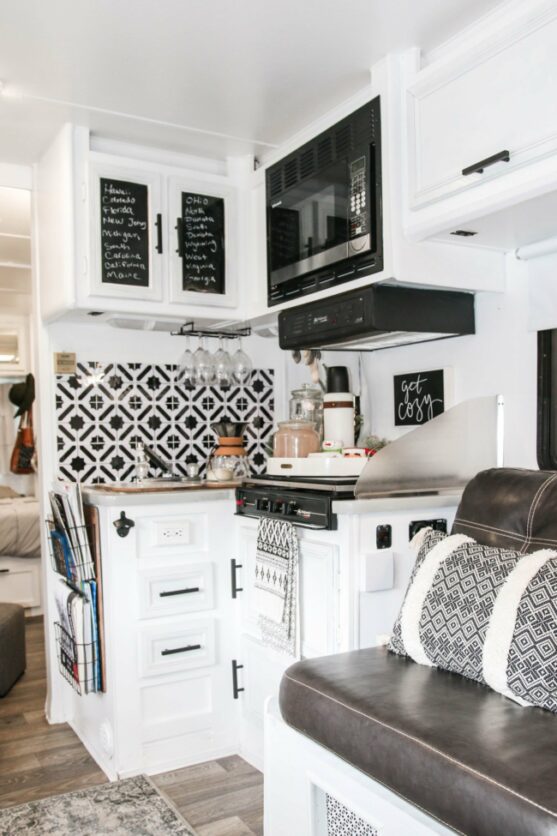
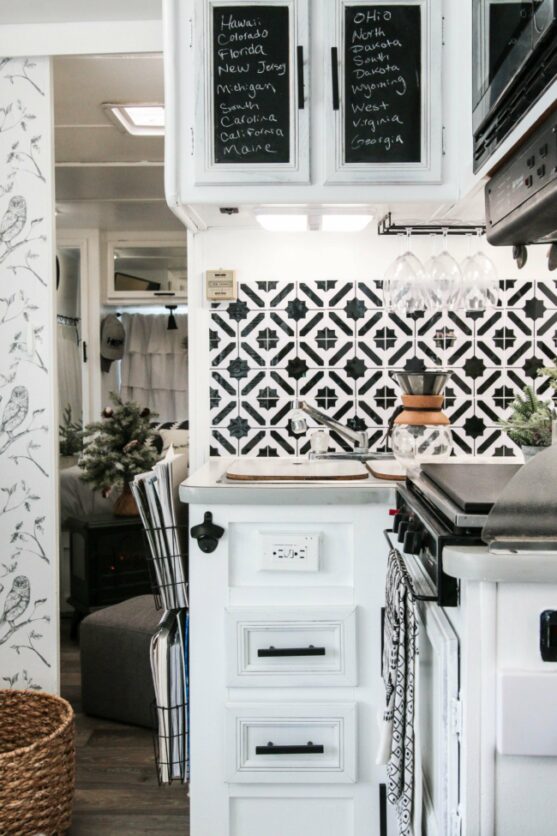
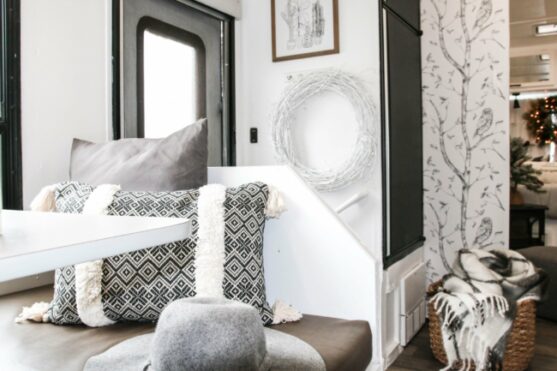
- Peel and stick owl wallpaper
- Peel and stick jewel tile back splash
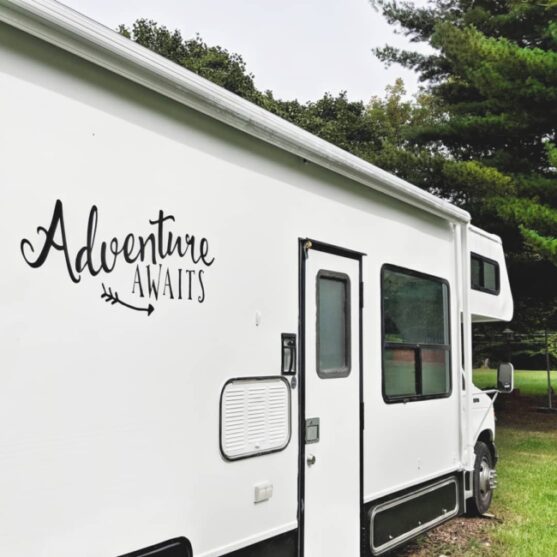
- “Adventure Awaits” vinyl sticker
- “Hello” vinyl sticker
- Vinyl sealing tape – I used this as trim around cabinets and floor!
- Microwave
- Drip rail (rain gutter)
- Rolled vinyl flooring – from Home Depot!
- Rugs and pillows – BH&G from Walmart!
- Paint – Behr Marquee in white, satin finish
- Wall decor and pictures – Hobby Lobby
- Cabinet Hardware
- Happy Camper vanity plate
- LED lights
- LED spotlights over bed
- Couch – We purchased from a local RV dealer’s listing on Facebook Marketplace. Find it new: here
- TV/DVD combo with a mount that can be moved to the outside of the camper!
- TV mount with two brackets that can be moved inside or outside
- Roku TV
- Aerosol Fire Extinguishers
- Fire Extinguisher Mount
- LP Gas detector
- Carbon monoxide/smoke detector
- Storage Ottoman
- Surge protector/power strip with USB
- Roof tape
- Liquid rubber roof sealant
- Exterior Sealant
Thanks for joining me on this little tour!
Don’t hesitate to ask if you have any other
questions about products I used.
I’ll share more details in future posts!
You Might Also Like…
A Cozy Christmas in the Camper


Angelica
Did you have to remove the decals on the outside or just paint over them? And what kind of paint, like exterior house or…?
Joyce
What paint to use on gel coat exterior?. Must graphics be removed
Heather
Hey
Great job!! I’m redoing our 1999 motorhome. Wondering what paint you used on ceiling? And did your paint stick to the hideous gold trim pieces? Did you buy new shower stall pieces?
Thanks. Heather
Kim Ross Recalma
I am wondering if you painted over the fake gold trim on the cabinets and if so how it stood up. What type of paint? Thanks, Kim
Maria
Could you please let me know what kind of light fixtures and bulbs you used?
Thanks, Maria
monica sullivan
Did you have a cabinet company come and do your counter tops ? camper looks amazing ! any pictures of the bathroom ?
Jackie
Awesome job!! Using ton of inspiration from this post for our RVR! I am curious where you found your shades and if you had to do custom sized ones or any cutting??
Sylvia
Did you sand and prime cabinets? Which primer worked for you?
Jesse Willis Smith
Cool looking RV, love the touches of home you put on it. The cute fireplace in your bedroom, is that an electric one with a cord or what? Any information would be great.
Jesse S.
Sarah Lemp
Click on the image in my sidebar titled “SHOP MY RV” for the link!
Lisa
Hello I just Purchased a 2006 5th wheel while I’m hosting Airbnb guests in my home. Your article was so inspiring because those are the things that I need to do I have the interior decorating down pat because that’s one of the things I love to do but as far as getting the wood and the floors exchanged out and getting the outside painted there is much work to do. But I’m excited because I anticipate how cozy it will be when I am completed. I’ve already purchased my cabinet and interior wall paint and flooring just have some soft spots to repair in the floor and turn this into a haven of cozy and comfort like yours. Thank you so much for the inspiration!
Sarah Lemp
That is so great to hear!! Thanks for commenting and happy renovating!!
Mary Bellestri
Hello,Where did you purchase the vinyl leather dinette cushions? Love the look.
Thank you,
Mary
Britta
We’re a homeschooling family of six that loves to camp too. We renovated a 1992 travel trailer. Where did you get your couch cushions?! I have ours temporarily covered with some cheap stretchy Amazon covers. They look nice and are washable, but slide around. I love your cleanable cushions!!
Sarah Lemp
Hi! The couch in this RV was a complete replacement. We bought a new one second-hand off of Facebook Marketplace. But, I have also bought them at RV surplus stores here in Michigan and have also purchased vinyl from fabric stores to recover cushions. I have a section on this in my book :)
Peggy Cogswell
Did your ceiling have carpet on ot? If so did you paint it?
Shantal
We just started on our 1990 RV. I noticed that yours had gold trim on the cabinets like ours does. Did you just paint over it? Remove it? It is baffling we as to what to do. TIA!
Laura
Hi!!
So I am trying to figure out how to make/purchase curtains or some kind of window cover for the large, over cab front window. It looks like your window is similar to ours, in that it is not exactly vertical, but sort of on a diagonal or leans slightly away from being a straight wall.
Any ideas/inspiration?
Thanks!
Laura
Angie
Howwwww do you remove “velor” type material from all of the framework around a 90s Class C can? I just want to paint all of the wood under the fabric white, but there are no screws. Every inch of this thing is covered with 1993 turquoise velor fabric and it needs to go!
Angie
Oops, they should have said “cab.”
Laura
We just did exactly what you are talking about, on our 95 Yellowstone Capri. Ours was exactly how yours sounds, there was huntsman lodge beige/tan velour everywhere!! On the banquette, on the futon, on the bulwarks, the walls, everywhere!!!! It was so dingy looking and dirty/smelly. So I took into it with upholstery scissors. Once I got a chunk out, I could see where the staples were (mostly under fake buttons that made it look “quilted”) and then I used a screwdriver to pry those off, and the whole mess mostly came off in one big chunk. There were a few places where there was also some glue, but a scraper worked to release the fabric from the glue, and then I just sanded everything and started priming and painting. It is AMAZINGGGGG what the white does. The whole camper looks so clean and open now!
Lisa
Hi Sarah,
My husband and I are beginning the journey of renovating a 96 Fleetwood Discovery and I am quite inspired by your ideas and design elements. I wanted to check on the paint color you used for the lower cabinets in the Pace Arrow. They look more turquoise/mint than the sage tones of the Behr Underground Gardens you show in the product list. I have cherry cabinets that I would like to bleach but am wanting to the lower cabinets to stay lighter and more like the ones in the Pace Arrow. Thanks.
Sarah Lemp
Hi Lisa! Yes, they are in fact Underground Gardens. I chose that color because I wanted a more sage-like hue, instead of turquoise, but in different lighting they do pick up more of the turquoise. Overall I really like the color, but I guess no matter how hard I try to find a different color, all my colors end up looking the same LOL This color looks very similar to what I used in our Georgie Boy Class A (but that was Scarborough by Glidden). I actually tried to pick out something different but they still ended up looking very similar. I’d say in this case, the color sample is definitely greener than what it looks like in real life.
Harry
You did an amazing job. Recently rescued a 1985 Jamboree.
Cabover was a complete disaster. Not many pieces left to determine how it was built
especially the first layer of support.
Do you have any more images of the cabover floor at the the stage in
the image where you are in the foreground smiling and the cabover is in the background
with a drill setting on the right.
That would be a great help
Stephanie
Did you paint the kitchen sink and shower? It’s not pictured but I am curious… we just bought a camper and the sinks and shower are yellowish lol. You are very talented and inspiring to so many of us… thanks for sharing your talent and artistic inspirations with us.
Karen DelMastro
We have a similar rv and it had a leak over the cab when we purchased it. The cushions over the cab look terrible. I need to redo or recover but they are such an odd shape and very unwieldy. I noticed that you have the same. What did you do to yours?
Michelle Proenza
This looks FANTASTIC! On the kitchen cabinets I noticed in the before picture that they have a mirror. Did you use chalk paint to cover the mirrors on the cabinets?
Sarah Lemp
Yes I did!
Deana Clark-Carlisle
Hi, we have the same camper! Got it at a steal!! 700 bucks. I have painted and used the peel n stick wallpaper as well. Love It by the way! My question to you,
The ceiling? Very yellowish and dirty, I have looked and researched cleaning it. But I seen you said you painted yours, is it a fabric material? Any advice would be awesome!
Brittney
Hi, have you done a YouTube video tour of the RV? If so, could you post a link?
Leann Faber
Hey there!! We just bought an RV, it’s our first. I remodel homes but I have never done an RV. My question for you is, I’ve watched a ton of video on reupholstering seats, but I noticed I’ve got some tricky non cushion areas I need to do. You have the exact same issue as us. Any advise? It’s not letting my send you a pic.
Nikki
Hi Sarah,
I don’t live far from you in Michigan. I want to redo an RV but have no clue where to start or who to help me. My biggest worry is the frame if there is water damage. Any tips?
My biggest question is where do I park the RV for the remodel? We can’t park it in my driveway.
Also do you do consulting to give me tips on the barebones such as flooring etc
Thanks for the help.
Angie
I was wondering where you got the little fireplace and if you had a link? Thank you and it’s gorgeous!
Angie Roberts
We bought a 24 ft. 2012 Forest River Sunseeker. In the last year we have experienced a water leak over left side of bunk that is appearing over light fixture. We used Flex Seal Products to seal where we thought leak was coming from. We are still experiencing water dripping through light fixture. Of course we are so frustrated.
What products did you use for your roof leak? Also, was it a process to find where the leak was originating from?
Sarah Lemp
I have used a number of products:
Extreme Stretch caulk: https://amzn.to/2NQFBxX
Flex Seal spray: https://amzn.to/2NQFTVz
Permanent repair tape: https://amzn.to/2LyF29s
The real magic comes from practicing excellent detective work! Is your camper sitting perfectly level or does water run off the top in a certain direction? If there is the slightest slant, it could be coming in from the opposite corner and running through the ceiling and out from around the light fixture! When there is a leak, I don’t take chances, I inspect and repair the entire roof. Recaulk or respray, use the repair tape wherever it looks warn down or cracked. Recaulk especially around any roof vent or opening. Air conditioner units are also known to have leaks happen from the inside. Make sure there is a clear drainage path around your air conditioner. I fixed one trailer where the previous owner had caulked all the way around the air conditioner, so there was no where for condensation to run off. That condensation has to go somewhere! Water can get in through the tiniest sliver of a crack!
Good luck and happy hunting! :)
Susan Mobus
I loved the mini portable fireplace but don’t see the brand or cost listed anywhere. Is it propane? Flames look very realistic! Beautiful job btw, thank you for sharing!
Rayne
Hi Sarah, amazing job for sure. Have you ever used the mineral paints by Fusion? Minimal sanding, even on varnished wood. I have the oak cabinets in my truck camper and the VERY thin wallpaper is sort of “shrinking” in spots so i am intrigued by the peel and stick wallpaper you used. I wonder how mine will do being peeled off?
T Barber
We are getting ready to remodel a motorhome. I’m super excited!, my question is how is the peel and stick wallpaper holding up? Second question: the cabinets, what’s your tips on painting them?
PS. You’ve done a beautiful job
Thank you
Sarah Lemp
Hi! I actually used regular wallpaper on the cab and peel and stick on a door and an exterior wall. I used peel and stick tile on the backsplash. I have found the different brands to be working differently… The regular wallpaper is holding up well. I was worried about using peel and stick on an exterior wall, but so far it has held up great! It is a high quality paper, you can find it here: https://amzn.to/2Vx5ash The peel and stick back splash did not do so well They fell down the next day! I reapplied them using a glue stick and they have stayed up so far! :)
I have found chalk paint with a water based poly top coat to hold up really well in high traffic areas. I used chalk paint on my benches and it has done great. If you prep the surface well, regular paint will hold up really well on cabinets. I recommend sanding lighting and using a liquid sander before painting with a paint and primer in one. Good luck!
Kaiti
This was a huge help. The materials used are hyperlinks for you to shop from.
https://youtu.be/XWuoyn-T3Pg
Beth
Beautiful Reno job. How much did the renovation end up running you?
Sarah Lemp
Thank you! Our budget was $2,000 – I’ve been meaning to write a more detailed price breakdown, but we were pretty close to that number once we bought all new tires and had a couple mechanical things fixed.
jim Tirre
Looks great. We just purchased a 1997 travel trailer. I will be doing a makeover on this bad boy this summer.
Carrie
I am getting ready to tackle our camper Reno. I’m interested in using the peel and stick wallpaper, but worried it won’t withstand the heat when the camper is closed up. you did a great job
Sarah Lemp
Thanks, Carrie! I actually used regular wallpaper on the cab and peel and stick on a door and an exterior wall. I used peel and stick tile on the backsplash. I have found the different brands to be working differently… The regular wallpaper is holding up well. I was worried about using peel and stick on an exterior wall, but so far it has held up great! It is a high quality paper, you can find it here: https://amzn.to/2Vx5ash The peel and stick back splash did not do so well They fell down the next day! I reapplied them using a glue stick and they have stayed up so far! :)
Jami Davis
Hi! We are looking to purchase a class C almost identical to this. For the same price. For all that you have done, how much did you end up spending on renovation alone? It’s SO beautiful!
Brook
How does the rolled vinyl floor hold up for you? Was it easy to install?
Sarah Lemp
Thank you so much!! We spent approximately $2,000. I actually just wrote a post about the price breakdown here: https://www.allthingswithpurpose.com/cost-breakdown-for-renovating-a-camper/
Pamela
Good morning Sarah! You did a beautiful job of renovating that RV! Wondering what you think the total investment was for the redo? Thank you! -Pam
Sarah Lemp
Approximately $2,000. I actually just wrote a post about the price breakdown here: https://www.allthingswithpurpose.com/cost-breakdown-for-renovating-a-camper/
Jennifer Morris
Do you sell your redos?
Sarah Lemp
We sell some of them! We’re currently enjoying this RV, but if we find that we need something bigger or we find a good deal on a trailer we may flip it right away!
Leslie Burns
What did you end up doing with the front cab? Did you replace the seats? Did you install back-up cameras?
Sarah Lemp
Hi Leslie! We removed the seats so we could lay new carpet (I got a role of indoor/outdoor carpet at Home Depot) then we used an upholstery steam cleaner on the seats and put them back in. They weren’t in terrible shape, just dirty. I’ve been keeping my eyes open for new ones maybe from a junk yard? I’ve also looked into seat covers on Amazon. We found that it would be expensive to install a backup camera, but we found a magnetic one that runs off of an app on your phone! I’ll try and find the link for it and post it soon.
lyn johns
Did you replace the ceiling, if so with what or did you just paint it?
Sarah Lemp
We just painted it! :)
Charisse
I must say im so impressed with the way your RV turned out!!! We recently just bought a 2003 36ft class A and even though it is in excellent condition and super clean, it is super dated and ugly colors and decor. I want to paint all the cabinets white. I saw were you put the type of Behr paint but I was wondering did you put any kind of sealer over the top to keep them from scratching ? I’m so inspired to redo ours now that I saw yours!!!! Thanks!!!
Bob Montour
I have to say you did an excellent job in your renovation. We’re looking for a motor home and can’t afford a new one so a renovation of and older one sounds good to us. The insides would be gutted and redesigned to suit our needs. And everything would be white and not a depressing brown color. You just motivate me to start looking for a lower mile RV. “Thank you”
Holly Bodner
Did you repaint the black on the windows? If so, HOW did you do it?
Sarah Lemp
I power washed them all first and then painted the whole camper before I noticed that there were a few little spot of black that needed touch up. I just used a black exterior paint and a little touch-up brush (like a kids paint brush). It blended well and didn’t need to do everything, just a few spots here and there.
Joanna
What/ how did you paint the exterior? Did you spray paing it or roller? I am going to be painiting my RV in the near future.
Lori
I would love to know about the exterior paint also!! We just bought one and that is the most important part for me since it will be in our neighborhood while we are packing up for trips etc! Cost and process if you have posted please share!!! We bring ours home Monday!!
Sarah Lemp
Hi Lori!
I wrote a post about painting the exterior, you can find it here: https://www.allthingswithpurpose.com/painting-the-exterior-of-an-rv-or-trailer/
Sarah Lemp
Hi Joanna,
I wrote a post about exterior painting. Find it here: https://www.allthingswithpurpose.com/painting-the-exterior-of-an-rv-or-trailer/
wanda
You did a beautiful job.
Marissa
I think we are secretly sisters. I just ran across your blogs and I have read like 8. You are awesome thank you for the inspiration! God bless!
Sarah Lemp
Hi Marissa!! Thank you so much, you’re super sweet!! :)
Pam
Love the job you did! What kind of paint did you use on the out side?
Sarah Lemp
Hi Pam! Thank you so much! I used Behr Marquee, Exterior paint in white :)
Regina Fisher
Wow…you did an amazing job. I want to attack (renovate) our 5th wheel. Seems overwhelming, but would love to paint all the wood white also. Can you tell me if it was totally tough project and would you do it again? What products did you use,? Thanks so much!